Top 10 Things To Know Before You Buy A Domain Name

Things To Know Before Buying Domain Name
The Search for finding a good domain name starts when we are ready to get our business online and that's the need of every business today as INTERNET is the heart of every business by now. A Business is no more successful for those who are not having their business online as the majority of people now prefer buying online while sitting in their room. People are running out of time and everyone is in the great hurry to get the multiple things done in short time so they prefer buying and booking orders online as it saves a lot of time. But there is much more you need to know before setting your business online which starts from Buying A Good Domain Name which will differentiate your business from others' and make you stand out. Let's see how.

Things To Know Before You Buy A Domain Name

  • 1) Checking Availability: The Crucial step it is. Before you start working your ass off on building a business with the unique name, check online the availability of Domain name for your business name. It may happen that it is already taken by anyone else around the globe so ultimately you will end up losing your best choice of a domain name for your business. You may also check for expired domains which are recently expired and not registered yet by going here www.expireddomains.net

  • 2) Extension: Main Top Level Domain Names are With Extensions .Com, .Net, .Org, .Info and .Net where .Com remains mostly used extension which is for Commercial Purpose. It is strongly recommended that you use a ".Com" domain name extension for your business as it fits the best and gets rankings in search engines all over the world. But in case your Business is Local, then do read 4th Point.

  • 3) As Short As Fits Best: Keep Your Domain Name as short as possible. The Shorter It Is The Better. Keep a good combination of your name and your business name or Your Goals And Business name. Try Different variations and pick the one which satisfies you. Keep its length up to less than 15 characters.

  • 4) Location or Targeted Area: If Your Business is Local then consider buying a Top Level Country Domain Name ie. your-business-name.in for India or your-business-name.au for Australia. Then your website/blog will get higher rankings in that particular country where is your targeted audience.

  • 5) Easy To Type And Remember: Now just think of some big players around the web like as Facebook, Wikipedia, and Amazon. Did you get it? These names are simple, short and eye catchy which are easy to type and remember.


  • 7) Avoiding Hyphens or Numbers: If possible, avoid using hyphens or numbers in your domain name. It works best if there is no hyphen or number in a domain name. But if you got no choice, you can use a hyphen which is far better than not having it at all. Be creative and I bet you would come up with better options available.

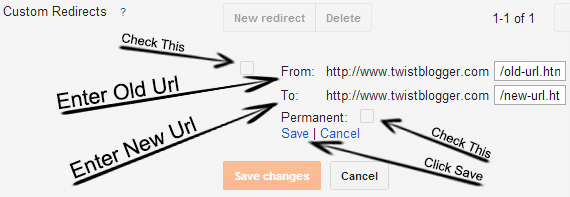
  • 8) Protecting Your Brand: Now if you Have Registered your domain name with a .com or any other extension, now its time to protect your Brand name from your competitors. Because by the time when your business will get popular, competitors will get their hands to steal your audience by registering the same domain name with the other extensions available. So this time, be ready to buy all other major TLDNs and make a redirect to your main domain name. Be safe.

  • 9) Checking For Registered Trademarks: Before Registering your domain name for the business, do check if someone already have registered trademarks on that or not. If you are unable to get my point then you must Google "Microsoft vs. MikeRoweSoft" case. Do not infringe the copyrights of other people and stay away from serious trouble.

  • 10) Expanding Capability: Do not purchase a domain name which makes your business be limited. In future, your business may expand and include a wide range of products. Do not make your blog/website a single product/niche based ie. BabyGirlShoes.com is limited To Baby Girl Shoes so what if you start selling other baby girl products in future?

Conclusion: Above I tried my best to explain the Things To consider Before You Buy A Domain Name. These tips are the base for buying a good domain name and I hope you got something new from this post. I might have left some other important points so feel free to ask in comments and we will try to include them in our list. Thank you. Stay Safe!

How To Setup A Custom 404 Error Page For Blogger Blog

custom 404 error page
Having a custom 404 error page on your blog will give it a professional touch and users will not get annoyed or bad impression when they will land on your 404 error page. A 404 error is an HTTP standard code for an error when the client was able to connect with the server, but the server could not find/respond what was requested by the client. Here on blogger, by default it displays a message line, "Sorry, the page you were looking for in this blog does not exist" which looks very odd. So here we have designed a nice looking 404 error page for blogger blogs.


Steps To Setup Custom 404 Error Page For Blogger

Step 1) Read Thoroughly and carefully follow the steps. First of all go to Blogger → Template → Edit HTML
Step 2) Now click anywhere inside template code box and press Cmd+f or Ctrl+f and search for code ]]></b:skin> and just below that code line, paste the CSS code given below after making required changes as shown below in Step 3:

<b:if cond='data:blog.pageType == &quot;error_page&quot;'>
<style>
#main-wrapper { width: 100%;}
#sidebar-wrapper, .blog-pager { display: none !important;}
#content-wrapper { width:99%!important;}

.status-msg-wrap {
font-size: 100%;
margin: none;
position: static;
width: 100%;
}
.status-msg-border {
display:none
}
.status-msg-body {
padding: none;
position: static;
text-align: inherit;
width: 100%;
z-index: auto;
}
.status-msg-wrap a {
padding: none;
text-decoration: inherit;
}
#TB-404-error-box{
background: #FFFFF url(&quot;https://blogger.googleusercontent.com/img/b/R29vZ2xl/AVvXsEjzHGZ34bYD9h6XAn6terkOoMedHtsRlkX0FoC4XvcCWd2gLCNt-3pMakYRX_SQEEQ0wwzqPH0w_gEsGiYSMghT7c1nhSdEQRfiRChGlchWwI2j5ZV9FfDTV6RXZvbzeYs-Ghd8qmLp4TE/s1600/TB-Error-Page.png&quot;) no-repeat scroll 0% 95% rgb(255, 255, 255);
width: 97%;
margin: 0px 0px;
padding: 15px 20px 50px 20px;
border: 1px solid #E7E7E7;
-moz-border-radius: 6px;
-webkit-border-radius: 6px;
border-radius: 2px; height: 470px;
}
</style></b:if>

Step 3)
Static: The CSS Code Highlighted in RED Color hides the sidebar and footer pages to make it static and display on the full page. If you want to keep sidebar along with that message, just remove that piece of code.
(Note: Please note that this STATIC code may not work if your template is not using the same ID or Class names for sidebar wrapper in your template so make sure you use the same Class or ID name as used in your template code e.g., #sidebar or may be .sidebar or Anything else)

Background Image: You can use an image in footer area between "400 Page Not Found" message. If you want to change that image, find out image URL in above code and just make your own image in 990x140 pixels size and replace our image URL given below with your's and use 95% to fit the image in proper way by increasing or decreasing the %age value.

https://blogger.googleusercontent.com/img/b/R29vZ2xl/AVvXsEjzHGZ34bYD9h6XAn6terkOoMedHtsRlkX0FoC4XvcCWd2gLCNt-3pMakYRX_SQEEQ0wwzqPH0w_gEsGiYSMghT7c1nhSdEQRfiRChGlchWwI2j5ZV9FfDTV6RXZvbzeYs-Ghd8qmLp4TE/s1600/TB-Error-Page.png

Background Color: To change the background color of page, just change #FFFFFF color code with the desired one and Hit Save Button!!

Step 4) This time we need to go to Settings → Search and Preferences Settings → Then Custom Page Not Found under "Errors and redirections". Click edit and paste the HTML code given below inside box after making required changes given in Step 5. Please see the image below the HTML code for reference:
<div id='TB-404-error-box'>
<p align="center"><font color="#ff0000" style="font-size: 57px;"><strong>Oops!</strong></font></p>
</br><p><center><font color="#000">Seems like you either clicked a <div style="color: #0089D6; font-size: 27px;">Broken Link</div> <b>or a Page that no longer exist. Kindly do one of the followings:</b></font></center></p><div style="line-height: 25px; font-weight:normal;"><center><b>&#10004;</b> <a href='javascript:history.go(-1)'>&#171; Go Back</a>!</br><b>&#10004;</b> Help us to Serve you better by <a href='http://www.twistblogger.com/p/contact-us.html'>Reporting This Problem</a> to us!</br><b>&#10004;</b> Go to <a href='http://www.twistblogger.com'>Homepage Address</a>!<br/></center></div><p><br/></p><p align="center"><font color="#08C500" style="font-size: 100px;"><strong>404</strong></font></p><p align='center'><font color="#EB0F0F" style="font-size: 20px;">Page Not Found!</font></p> </div>
404 error page for blogger

Step 5) In the above HTML code, just replace our Contact Us link and Homepage Address Link with your links. You can play with the Text like as changing colors, size, weight etc. as they all are highlighted. Then hit save button and now visit your blog address with any link which does not exist and see the magic!!

Final Words: If you are unable to setup your 404 error page, then ask in comments below and let me analyze your blog template. I will help you to setup your custom 404 error page. You can subscribe to further updates via email for free. Share this post to show your love. :) Stay safe and Happy Blogging!

Blogger Search Preferences Settings | SEO

Blogger Search Preferences Settings
Blogger Search Preferences Settings is a cool feature to optimize our blogger blog with best ever settings to get higher rankings in SERPs. This feature has given a new power to bloggers to optimize their blogs in a better way than before like as Custom URL Redirect, Custom 404 Error Page, Meta Description, Custom Header Tags and Custom Robots.txt so overall these are cool features unless we do not use them. Let us begin to optimize our blog and use these settings for best ever SEO results.


Steps For Blogger Search Preferences Settings

First of all  go to Blogger Settings then Search Preferences Settings.
1) Meta Description: First option is of Blog Meta Description where we will put our Blog's description (Let it empty if you are already using meta description tags in your template code).

Click on edit link and write a brief description of your blog no more than 155 characters because it will be ignored by search engines after that particular limit.

Meta Description


2) Custom Page Not Found: Second option is of creating our own Custom 404 error page instead of showing the odd message, "Sorry, the page you were looking for in this blog does not exist". This is a separate tutorial Covered Here, "Creative 404 Error Page Setup For Blogger".

3) Custom Redirects: Third option is of custom redirects which means if there is a link on our blog which no more exist like as a older post you may have deleted, then we can make a redirect to that URL and can redirect this older link to a newer link on our blog.

You need to enter the URL after "www.yourdomain.com" like as "/2013/03/older-link.html" (excluding inverted comma) and in same way in new link like as "/2014/03/new-post". Please see the image below.

Custom URL Redirects


4) Custom robots.txt: Now this is the most sensitive part of our settings. I mean if we use it wrongly, our blog may suffer a great loss like as totally ignored by search engines. So use these settings precisely and carefully as mentioned and shown in image.

Custom robots.txt file content can be updated in here so we will add some important lines to it. Just copy paste the code given below (please remove any existing code if any) and hit save after doing compulsory changes as they are highlighted:
User-agent: *
Disallow: /search
Allow: /
Sitemap: http://www.twistblogger.com/atom.xml?redirect=false&start-index=1&max-results=500
Sitemap: http://www.twistblogger.com/feeds/posts/default?orderby=updated

Custom Robots.txt


5) Custom Header Tags: Last option is of Header Tags by which we will make our blog much more SEO optimized. We will allow our blog to be indexed in a better way so that the content of our blog will appear in SERPs as we have published.
Otherwise search engines will index our blog content by default settings like as indexing Archives, search description for our blog posts from Open Directories rather than from our own content and indexing search pages results. Click on Edit - Yes - then mark all the boxes as shown in image below (be careful).

Custom Robots Header Tags


Conclusion: By now, after completing all the steps given above, you are done with Blogger Search Preferences Settings. These settings are crucial from SEO point of view. If you are having any problem or question regarding these settings, ask below in comments and I will reply to you asap. Thanks for the visit, Stay safe and Happy Blogging!!

Understanding Nofollow And Dofollow Tag | What Does It Do?

Understanding Nofollow And Dofollow Tag
Bloggers who are either new or not concerned with SEO stuff, never bother using nofollow and dofollow tag because they don't know how to use or what does a nofollow tag or dofollow tag do. Today we are going to understand what these tags mean and how to use these tags on our blog for better SEO. So let us begin.

What is nofollow Tag?

A nofollow tag is used when the link you are sharing on your blog/site is not relevant to your blog or useless. When we use nofollow tag to a link, there is no link juice passed to this shared link address from your blog.

What is Dofollow tag?

There is no such thing like Dofollow tag. When we leave the link as it is and do not add a Nofollow tag to it, it is called dofollow link. Search engine crawlers will follow the link and your PR juice will be passed to that link.
Example: <a href='www.twistblogger.com' rel='nofollow'>Twist Blogger.com</a>

When Should I Use No Follow Tag?

You should add a nofollow tag to the external links (Links to outside from your blog) you share on your blog. The type of links you are sharing may not be relevant to your blog so it is must to add a nofollow tag to those all links and that does not mean you will always have to nofollow each and every external link. You can share some valuable and relevant links with dofollow tag like as the link to a blog in same niche. Here are some type of links you should add nofollow tag to:
1. Social Profiles On Social Networks
2. Pages On Social Networks
3. Torrent and Mirror sites like as uTorrent, 4Shared, Mediafire, Rapidshare and all
4. Demo Links
5. Big Players like as Microsoft, Google, Yahoo and Bing etc.
6. Any other irrelevant link.

By using nofollow tag to useless and irrelevant links, you get two major benefits:
  • It is High Page Rank because no link juice will be passed to these links and
  • No penalties from search engines because you are safe by using a nofollow tag to irrelevant or harmful links to your bog/site.

When Should I use Dofollow?

You should never add a nofollow tag to the internal links of your blog. Internal links are those links which are linked from one page of your blog to another page of your blog. These are links to other pages of your blog from one page. By interlinking to older pages/posts of your blog keeps them alive and help search engine crawlers to re-index them again because when you link a older page or post from a newer page/post then crawlers will pay visit to those all the links shared on new post/page and re-index them. Use Dofollow tag to all the internal links unless useless links like as links to comments.

There are a number of benefits of interlinking:
  • You keep receiving visitors to those older posts from new posts.
  • By adding dofollow tag to internal links, the main homepage PR flows in a balance which will help the robots crawl your site thoroughly as it serves like as a Sitemap.
Watch This Video From Matt Cutts of Google Webmaster Help On Use Of rel='nofollow' tag.

Hope this article helped you understanding how to use nofollow tag and What does a no follow tag do. If did not make use of these tags then start doing right now.

7 Best Tools For Bloggers To Correct Grammatical Mistakes

Best Tools For Bloggers To Correct Grammatical Mistakes
Grammar errors are common issues while writing a long article because when we sit down to write, we don't look at mistakes and continue writing until finish. Then when we get the article written, we don't go for proofreading thoroughly because this is the process we don't love to do :) So how do you manage to get your articles grammar errors free? Even if you are a native English speaker, does not guarantee 100% accuracy every time. And the process becomes more tedious for those all having to write in English as their 2nd language. Well, we have the right tools for you to get over this problem for free.

List of Best Tools For Bloggers To Correct Grammatical Mistakes Free

These tools listed above shall make you feel like having an English Teacher sitting right next to you, helping you for free.

[Note: You can not expect 100% Accuracy From These Tools As They Are Automated Software Available For Free. They Are Good For Vocabulary Mistakes and Finding Synonyms.]

1) Grammarly

This is the only tool I use personally for correcting my articles on the fly. I have its chrome extension installed and its works anywhere on the web. Whether I am writing an article, posting a tweet, facebook status or leaving a comment on other blogs, it works like a life saver.
It has the pro version of it too so you can have the total control of over 250 grammar mistakes you can possibly make. This one is highly recommended.

2) GingerSoftware

Ginger Software is very much flexible when it comes to using it. You can use it with MS office, Wordpad, Notepad, Browsers or even in "Blogger Post Editor" too. You need to download it to you desktop and then install. Installation may take few minutes as it will download the stuff and install the extensions to your browsers so that it can work in your browsers too. It is totally free. We recommend you to download this software if your English is very weak as it will help you to improve your English a lot.

3) PolishMywriting

This is a very nice, user-friendly and professionally designed tool. The best part is, "This Is Completely Free". Simply copy paste your article inside Text Box and hit "Check writing" button. All the grammatical mistakes will get highlighted in few seconds. Click on highlighted texts to see the suggestions to correct or ignore.

4) SpellChecker

One of my favorite tools because it gives us truckloads of suggestions to correct our mistakes. Just paste your text inside text box, click on Spell Check button then a pop-up dialog box will appear so wait for few seconds to load then start correcting your grammatical mistakes for free and wait, did i mention that it has 125+ languages to choose and work with? It is simply an awesome tool.

5) GrammarBase

Another high quality of free grammar check tool available online. Simply copy paste your text, click on Start Checking and within few seconds it will highlight for the errors. Click on highlighted text to see the suggestion and apply or ignore it.

6) PaperRater

PaperRater Grammar check does its job beautifully. Scan your text online for grammar errors, proofreading & spelling check. This tool is suitable for scanning long articles, essays, text documents etc and the same time you get improvement suggestion too.

7) Proofreadbot

Proofreadbot is free for 1 proofreading per week (limited to 600 words) and for unlimited use, you can go to the premium. In its premium features (Purchase a package), it includes many other tools like as Plagiarism Checker Tool, Style, Grammar Check etc. You can get 25 free Proofread credits if you share it on your Facebook with friends! 

Another Addition:

8) Blogger Post Editor

You may have tried it because it is inside your Blogger Post editor. It checks for the spell mistakes only. You can find this on the right side of post editor toolbar named "ABC".

Why Should You Use A Tool For Grammatical Mistakes?

Whether you are a Blogger or Freelance writer, you will have to take it seriously that your articles do not include most common grammatical mistakes because it affects you in a number of ways:
  • 1) Authority: If you are a blogger then it is crucial for you to write grammar error free article because your readers will notice the most common grammar errors you are making. They will not become your readers and next time when they will see your blog link in search results, they will not click it.
  • 2) Rankings: Search engines will notice the grammar errors in your articles while crawling and ultimately your rankings will go down. Your articles will get indexed but never appear in SERPs even on the 2nd page. So it is important from SEO point of view
  • 3) Advertisements: Why do you blog? To make money along with sharing useful stuff? Then who will opt your blog for advertisements? It will be very difficult to get approved for major ad programs like as Adsense, Infolinks, BuySellads or Individuals.
So this is why you need to take care of it every time before publishing your articles. We hope this article was useful and you got what you were looking for. Now take a minute and show your love by Liking, sharing and subscribing us :) Thank you, Take care and Happy Blogging Pals!!

SEO | Top 5 Link Building Methods

Top 5 Link Building Methods
Building back-links to one's blog or website are crucial for SEO purpose but the things are changed by the time and way of building back-links is no more a "just drop your link anywhere on the internet" game. The golden days are gone long back. Search engines have become more intelligent with their continuous algorithm updates. This time you need to follow some rules and guidelines led by search engines. Here I am listing top 5 Link Building Methods to help you get started with your link building process.

1) Article Marketing

In Article Marketing, we write articles related to our blogging niche and submit them to article directories which allow us to link back to our own blog from our "Author Bio". Article Marketing is one of the most effective methods for link building but in article marketing, what matters is "Quality" rather than "Quantity". People who don't know how to do article marketing effectively, only give importance to garner links by any means which do not work 100%, at least for the long term. People use Article Rewriter/Spinner Software to produce several articles from the single article in one go and submit them to article directories to generate loads of links to their websites. But you know what, you get several penalties from major search engines for your website and all those directories which house these spam articles. So be with Quality and submit your articles only to reputed Articles Directories like iSnare, Technorati, Go Articles, EzineArticles, Article Dashboard etc.

2) Social Networking

By social networking, we mean creating profiles on Social Networking sites like as Google+, Facebook, Twitter, Pinterest and so on. By creating some profiles and linking back to your blog will increase search engine visibility plus these profiles do have high page ranks in no time. Do not miss this option.

3) Guest Blogging

Guest blogging is becoming more popular day by day and you can see mostly on every blog in your reading list, is accepting blog posts from guests. What does it Guest Blogging means is that a blog author like you will allow other people to write an article on your blog and in consideration, you will allow a link back to the blog of article writer. The benefit of guest blogging is to get high-quality backlinks and recognition. Readers of the blog you write the guest post on will visit your blog and you will get more targeted audience. But again what matters is Quality. Before starting guest blogging, fill your blog with rich content and then you are on the way.

4) Blog Commenting

Blog commenting is what most of the people do, but we got a better way to do it. Most of the blogs use the no-follow tag for links in comments but still there are a lot of blogs with the commentLuv system of commenting and it works. That does not mean you do not have to comment on no-follow blogs, but no-follow links will bring no page rank juice. Still it is useful because relevancy is the key. I would comment on relevant blogs to my niche with no-follow tag rather than commenting on the non-relevant blog which uses commentLuv system. So always find relevant blogs to comment on.

5) Creating Viral Content

Final Golden Tip is to create viral content and reap the juice for a long time to come. Content which goes viral, always get loads of high-quality backlinks from several blogs on your niche and you get introduced to a massive targeted audience. Creating viral content is not as easy as hard but it is a combination of Creativity and Solid Knowledge of your blogging niche.
Related Must Read Article: Top 5 Free SEO Testing Tools

Update: We Just Missed Another Good Method!

6) Joining Forums Related To Your Blog Niche

Forums are great for link building, but it requires you to post useful stuff which is helpful for other forum members. Always use your links in your signature and do not drop your link or promote your blog in posts. Otherwise, your account will be banned. Be active in forums and build your credibility by helping other people. Engage yourself as much as you can then you will start receiving a good amount of targeted traffic too.

Conclusion: The methods above are based on solid grounds and proven by the time. Building quality backlinks will help you in good SEO so stick to it and never spread yourself thin, just stick with one or two methods and work hard until you see the results. After that move on to next. We hope these methods will help you and you liked this post. You can subscribe to free updates on future posts. We do not spam and only publish maximum 4 articles a week. Show your love and take a minute to share :) Stay Safe and Happy Blogging!!

How To Customize Comments Avatar Image In Blogger

Customize comment avatar image in blogger
In our previous post, we knew how to customize comment box in blogger template and this time we are going to customize the comment's avatar image which appears in the left side of every comment. The default style of it is little dull so we will make it more stylish and eye catchy by use of CSS effects as we did for comment box earlier and by using our own image for default avatar image which makes it more professional. So let us begin with the tutorial step by step.

Steps To Customize Comments Avatar Image In Blogger

If You Are Using Custom Template!

Step 1) As always, go to Blogger Template Edit HTML.

Step 2) Now you need to find a piece of CSS code (Whole CSS code of your template goes between <b:skin> Your CSS Codes </b:skin>). So press ctrl+f or cmd+f and search for the code .avatar-image-container { and select whole CSS of this class and replace it with the above CSS code [ Example: .avatar-image-container { CSS Code Of This Class} ].
.avatar-image-container {
background: url(https://blogger.googleusercontent.com/img/b/R29vZ2xl/AVvXsEi8_dlVOQnh1GkdikCOiPJ7Cq7dPbIsIfZXQ-f83fgkYqkelZ8DIj_YtcHWMM3kcnt47acfEd39ygHq1cklWqKxdKLUeoyIPOVGGWMh8IJGPAIsBUjhqnNk148P5oV_-RHxF2piNLMRafpa/s400/avatar.gif);
width: 36px;
height: 36px;
box-shadow: 0px 1px 9px #666;
border-radius: 50px;
border: 1px solid #fff;
}
In above CSS code, I have highlighted the image URL which is the default avatar image used by blogger if the commentator has no avatar image.

You can replace this image URL with your own image URL to which you want to make default avatar image.

You will see this .avatar-image-container class highlighted several times in group or alone if you searched for it using ctrl+f or cmd+f.

Now check other highlighted classes' CSS code where height and width will be 36px in most of the cases but in one class usually .avatar-image-container img { you will find that max-height, max-width or height or width is 32px. If that is the case then change those values to 36px and save your template. You are done.

If You Are Using Default Template From Blogger's Gallery!

In case you are using default template or any other template from blogger's template gallery itself then you just need to find this piece of code given below:
#comments .avatar-image-container img {
  border: 1px solid $(image.border.color);
}
And replace it with the CSS code given below. Now save your template and you are done!
.avatar-image-container {
background: url(https://blogger.googleusercontent.com/img/b/R29vZ2xl/AVvXsEi8_dlVOQnh1GkdikCOiPJ7Cq7dPbIsIfZXQ-f83fgkYqkelZ8DIj_YtcHWMM3kcnt47acfEd39ygHq1cklWqKxdKLUeoyIPOVGGWMh8IJGPAIsBUjhqnNk148P5oV_-RHxF2piNLMRafpa/s400/avatar.gif);
width: 36px;
height: 36px;
box-shadow: 0px 1px 9px #666;
border-radius: 50px;
border: 1px solid #fff;
}
.comments .avatar-image-container img {
width: 36px;
box-shadow: 2px 2px 0px rgba(0,0,0,0.13);
}
.comments .avatar-image-container img {
max-width: 36px;
}
.avatar-image-container img {
border: none;
}
In above CSS code, just replace the highlighted image URL with your own image URL to change the default comment avatar image.

So this is how you can customize comment avatar image and I hope this tutorial was helpful for you. If you liked it then please do share as sharing is caring :) and also let me know if you are facing any problem or you have any other question!

Recommended: Change "0 Comment" or "Post a Comment" Message in Blogger

Stay safe and happy blogging pals!